Make nature printed Christmas cards
I love making Christmas cards but sometimes life can get in the way so this year I’ve made some really simple Christmas tree cards using items from nature to print and paint with. These cards are also easy to make a lot of!
What you will need:
Blank cards
A few different shades of green paint - if you only have one green you can mix in a little red, blue, brown or yellow to make different shades.
Brown paper - packaging paper works well if you have some!
Leaves, tree needles, berries
A tray or piece of cardboard for your paint
Glue
Scissors
Gold and brown pens

What you need to do:
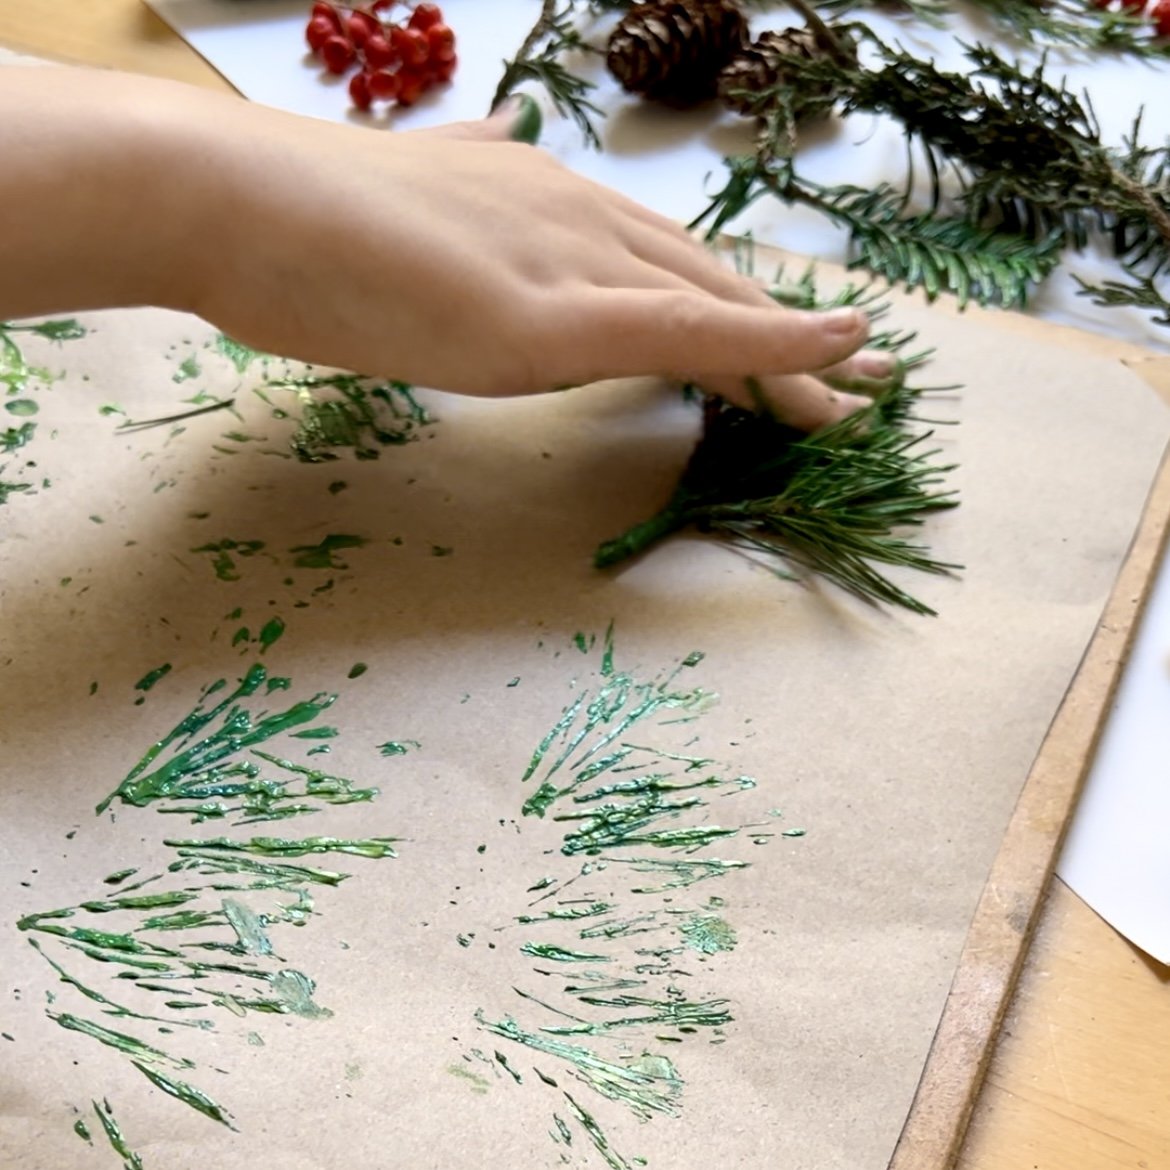
First you will need to gather a few nature items. The needles from conifer trees make great paintbrushes but you can also use berries and other leaves to make prints from.
When you get home, tape a large piece of brown paper to a painting board or a covered surface.
Then squeeze out some different shades of green paint onto your tray and spread out the paint. You might be able to find something suitable in your recycling bin to use as a tray but, if not, a largeish piece of sturdy cardboard would work well.
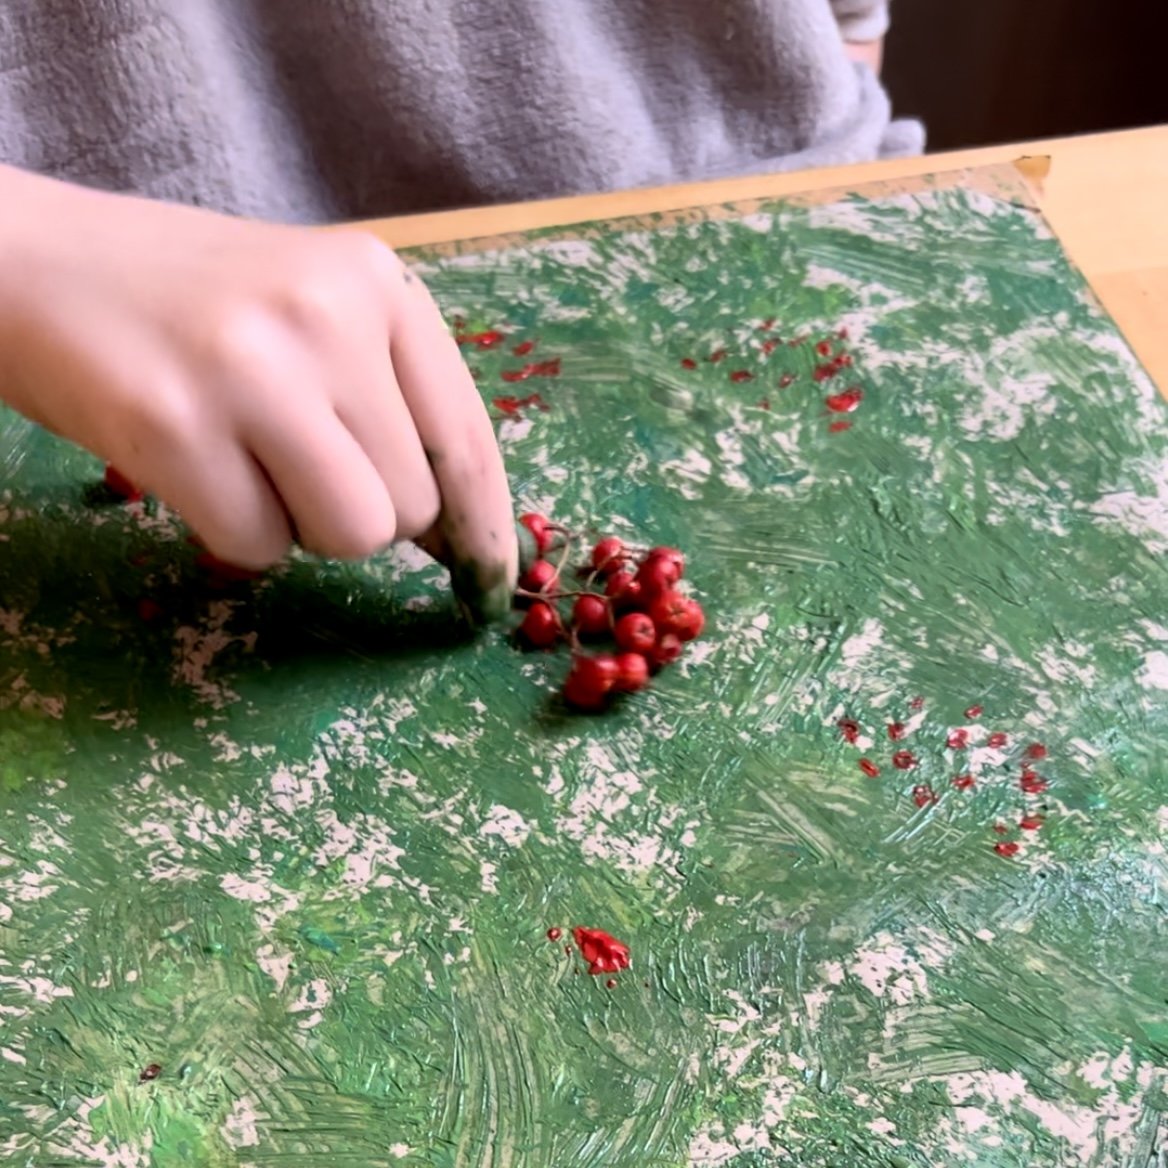
To make different shades of green, you can add a small amount of red, blue and yellow to your green. Just add a tiny bit to start with and mix well and then add more until you get the shade you want. I also added red to our tray so we could make red baubles.

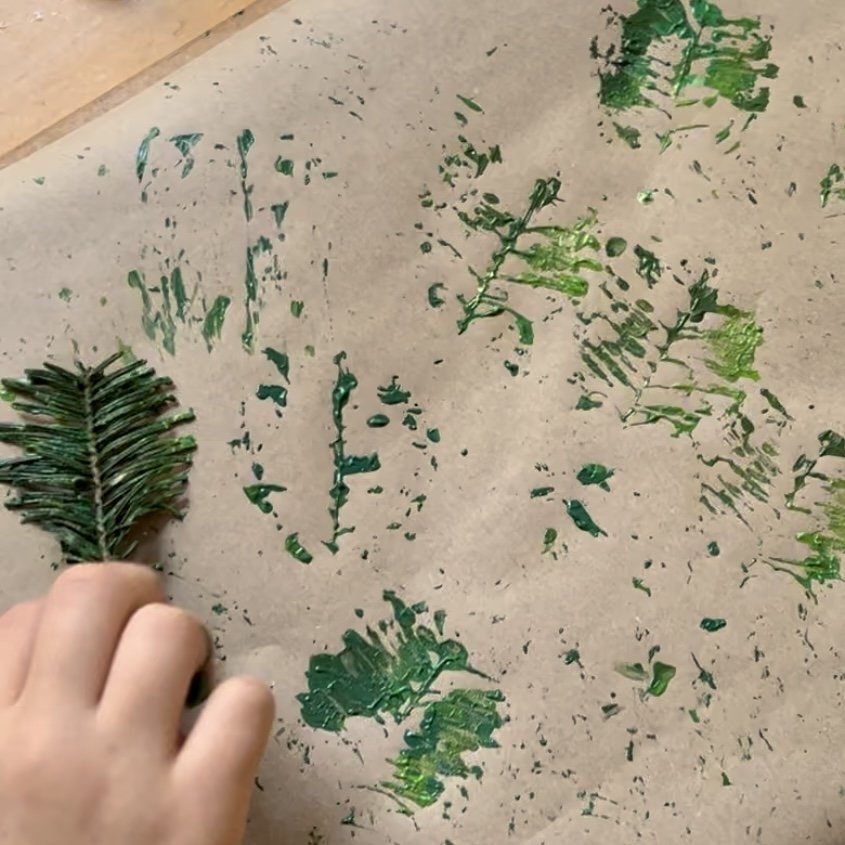
Then you can use your leaves and tree needles to paint your piece of paper until it is mostly covered. You can use the needles like a paint brush or you can press them onto the paper to make prints. You’re aiming to have texture on your paper and to show the different greens.
When you’ve mostly covered your sheet of paper with green, you can use berries and red paint to make lots of dots on your paper to resemble baubles.
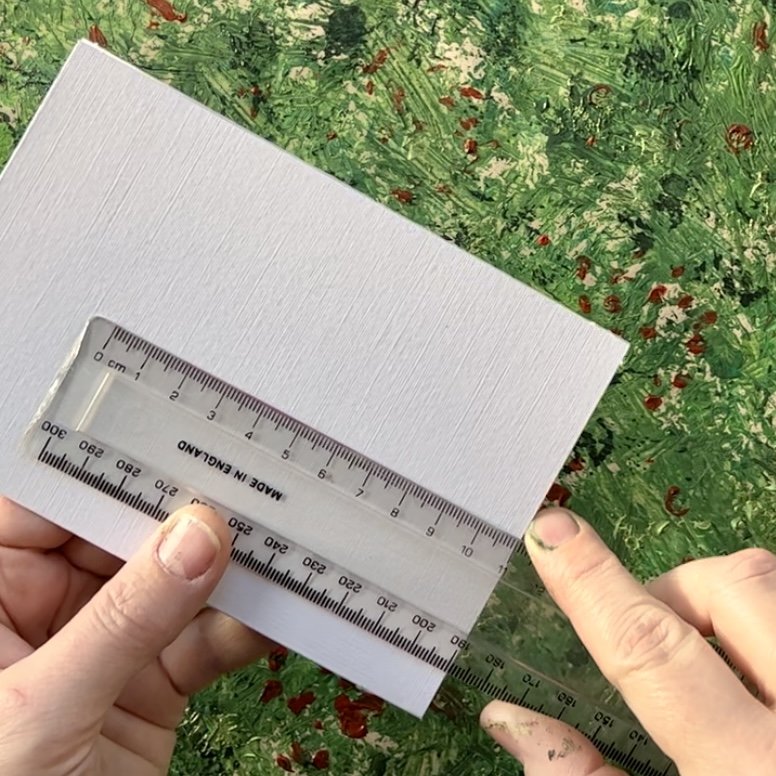
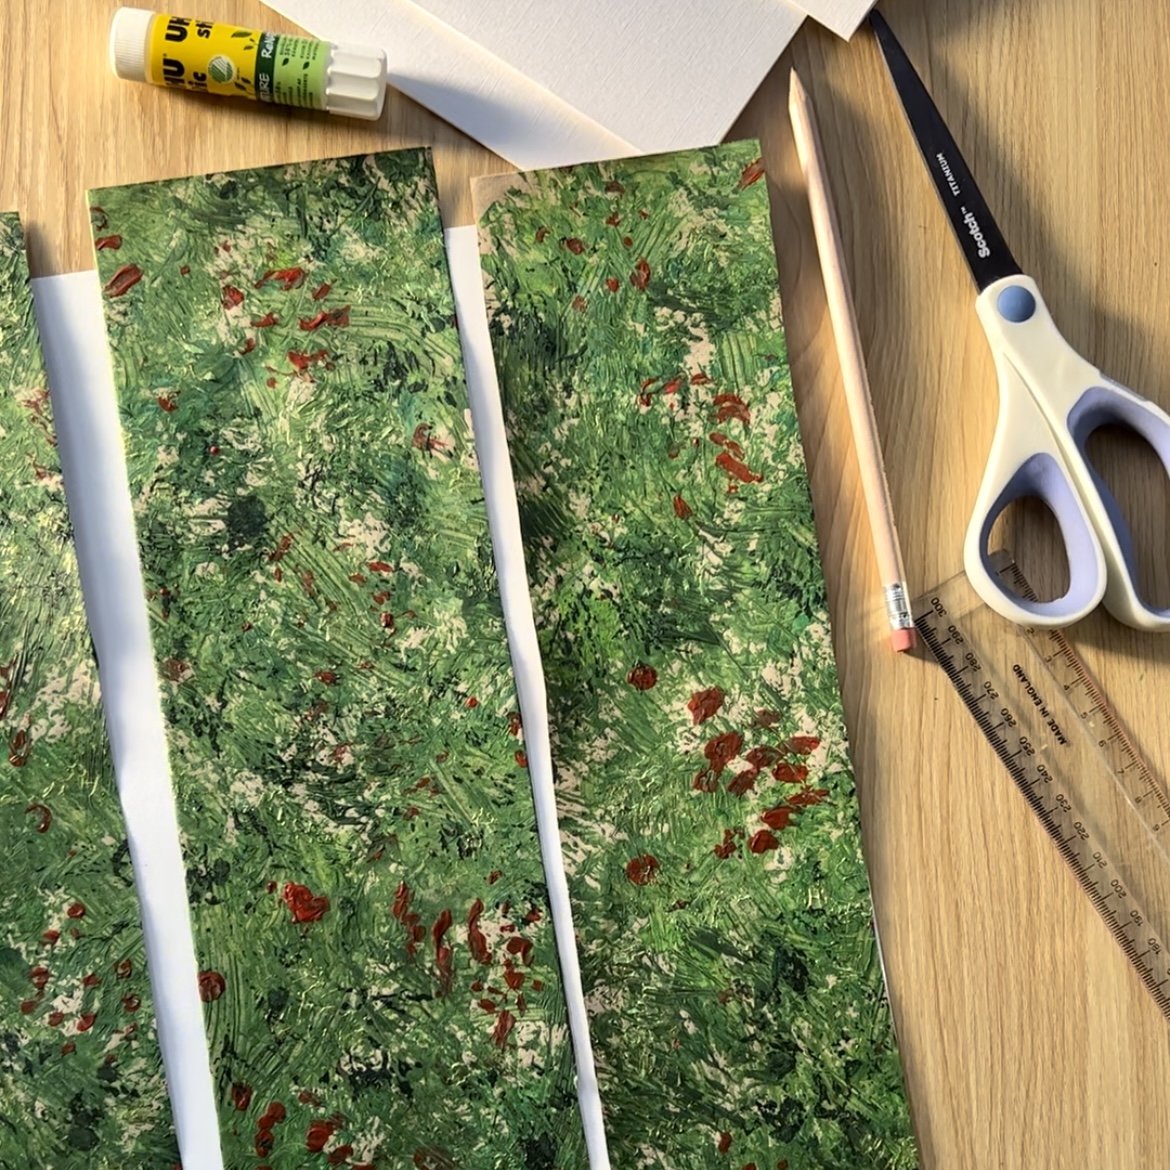
Once your paint has completely dried, you can cut it up to make your tree shapes. Roughly measure how tall you want the biggest tree to be and then cut a strip of the painted paper the same width. Then cut a second strip a centimetre or so smaller and then a third strip another centimetre smaller.
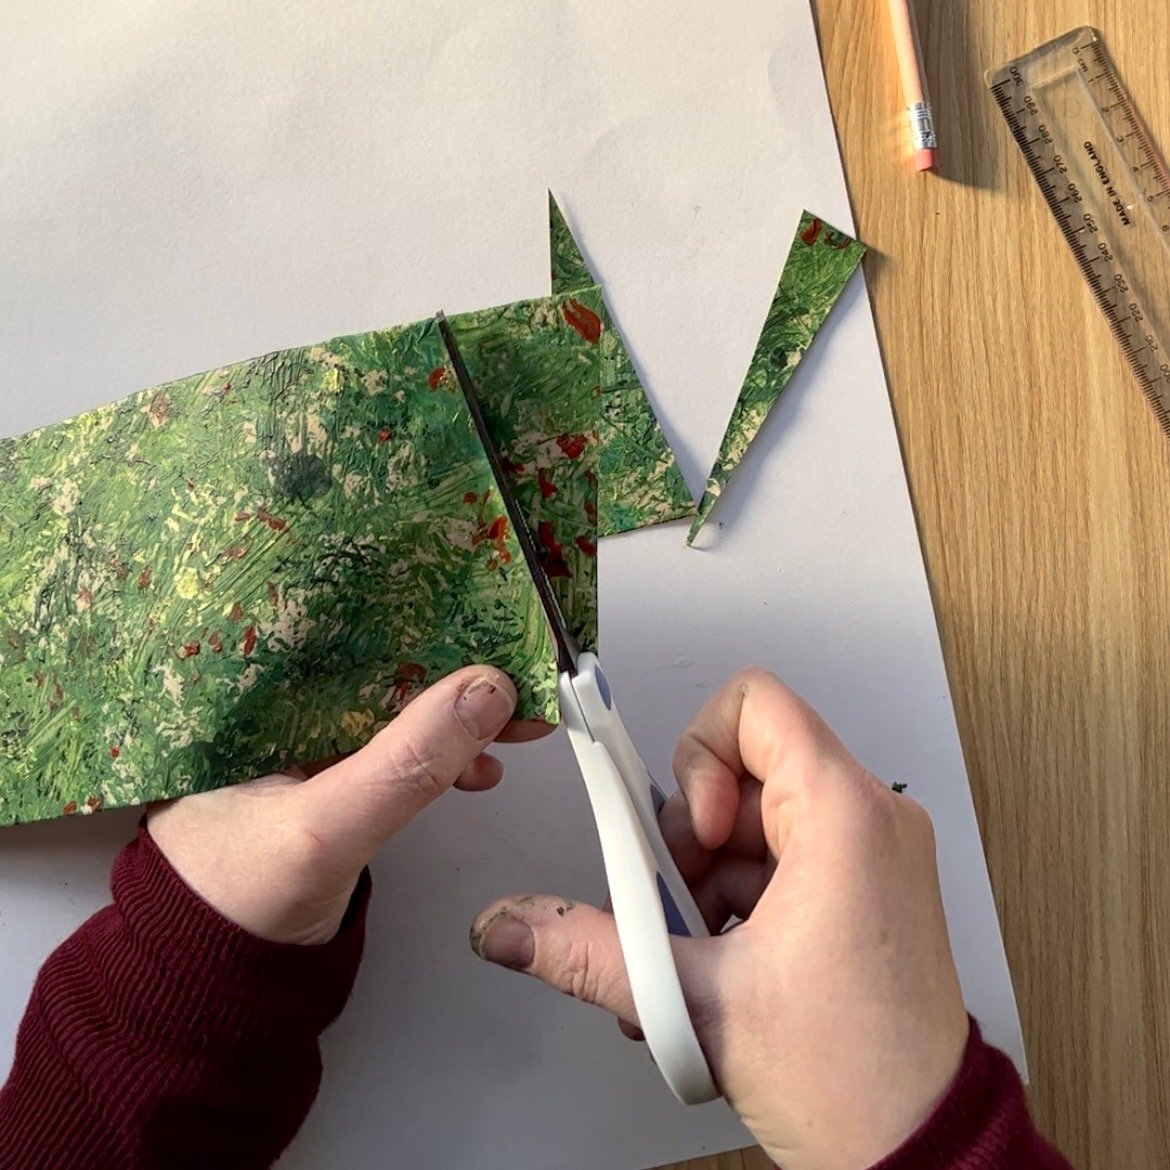
Now you can cut your three strips into thin triangles. You can measure if you want to but I cut these freehand.
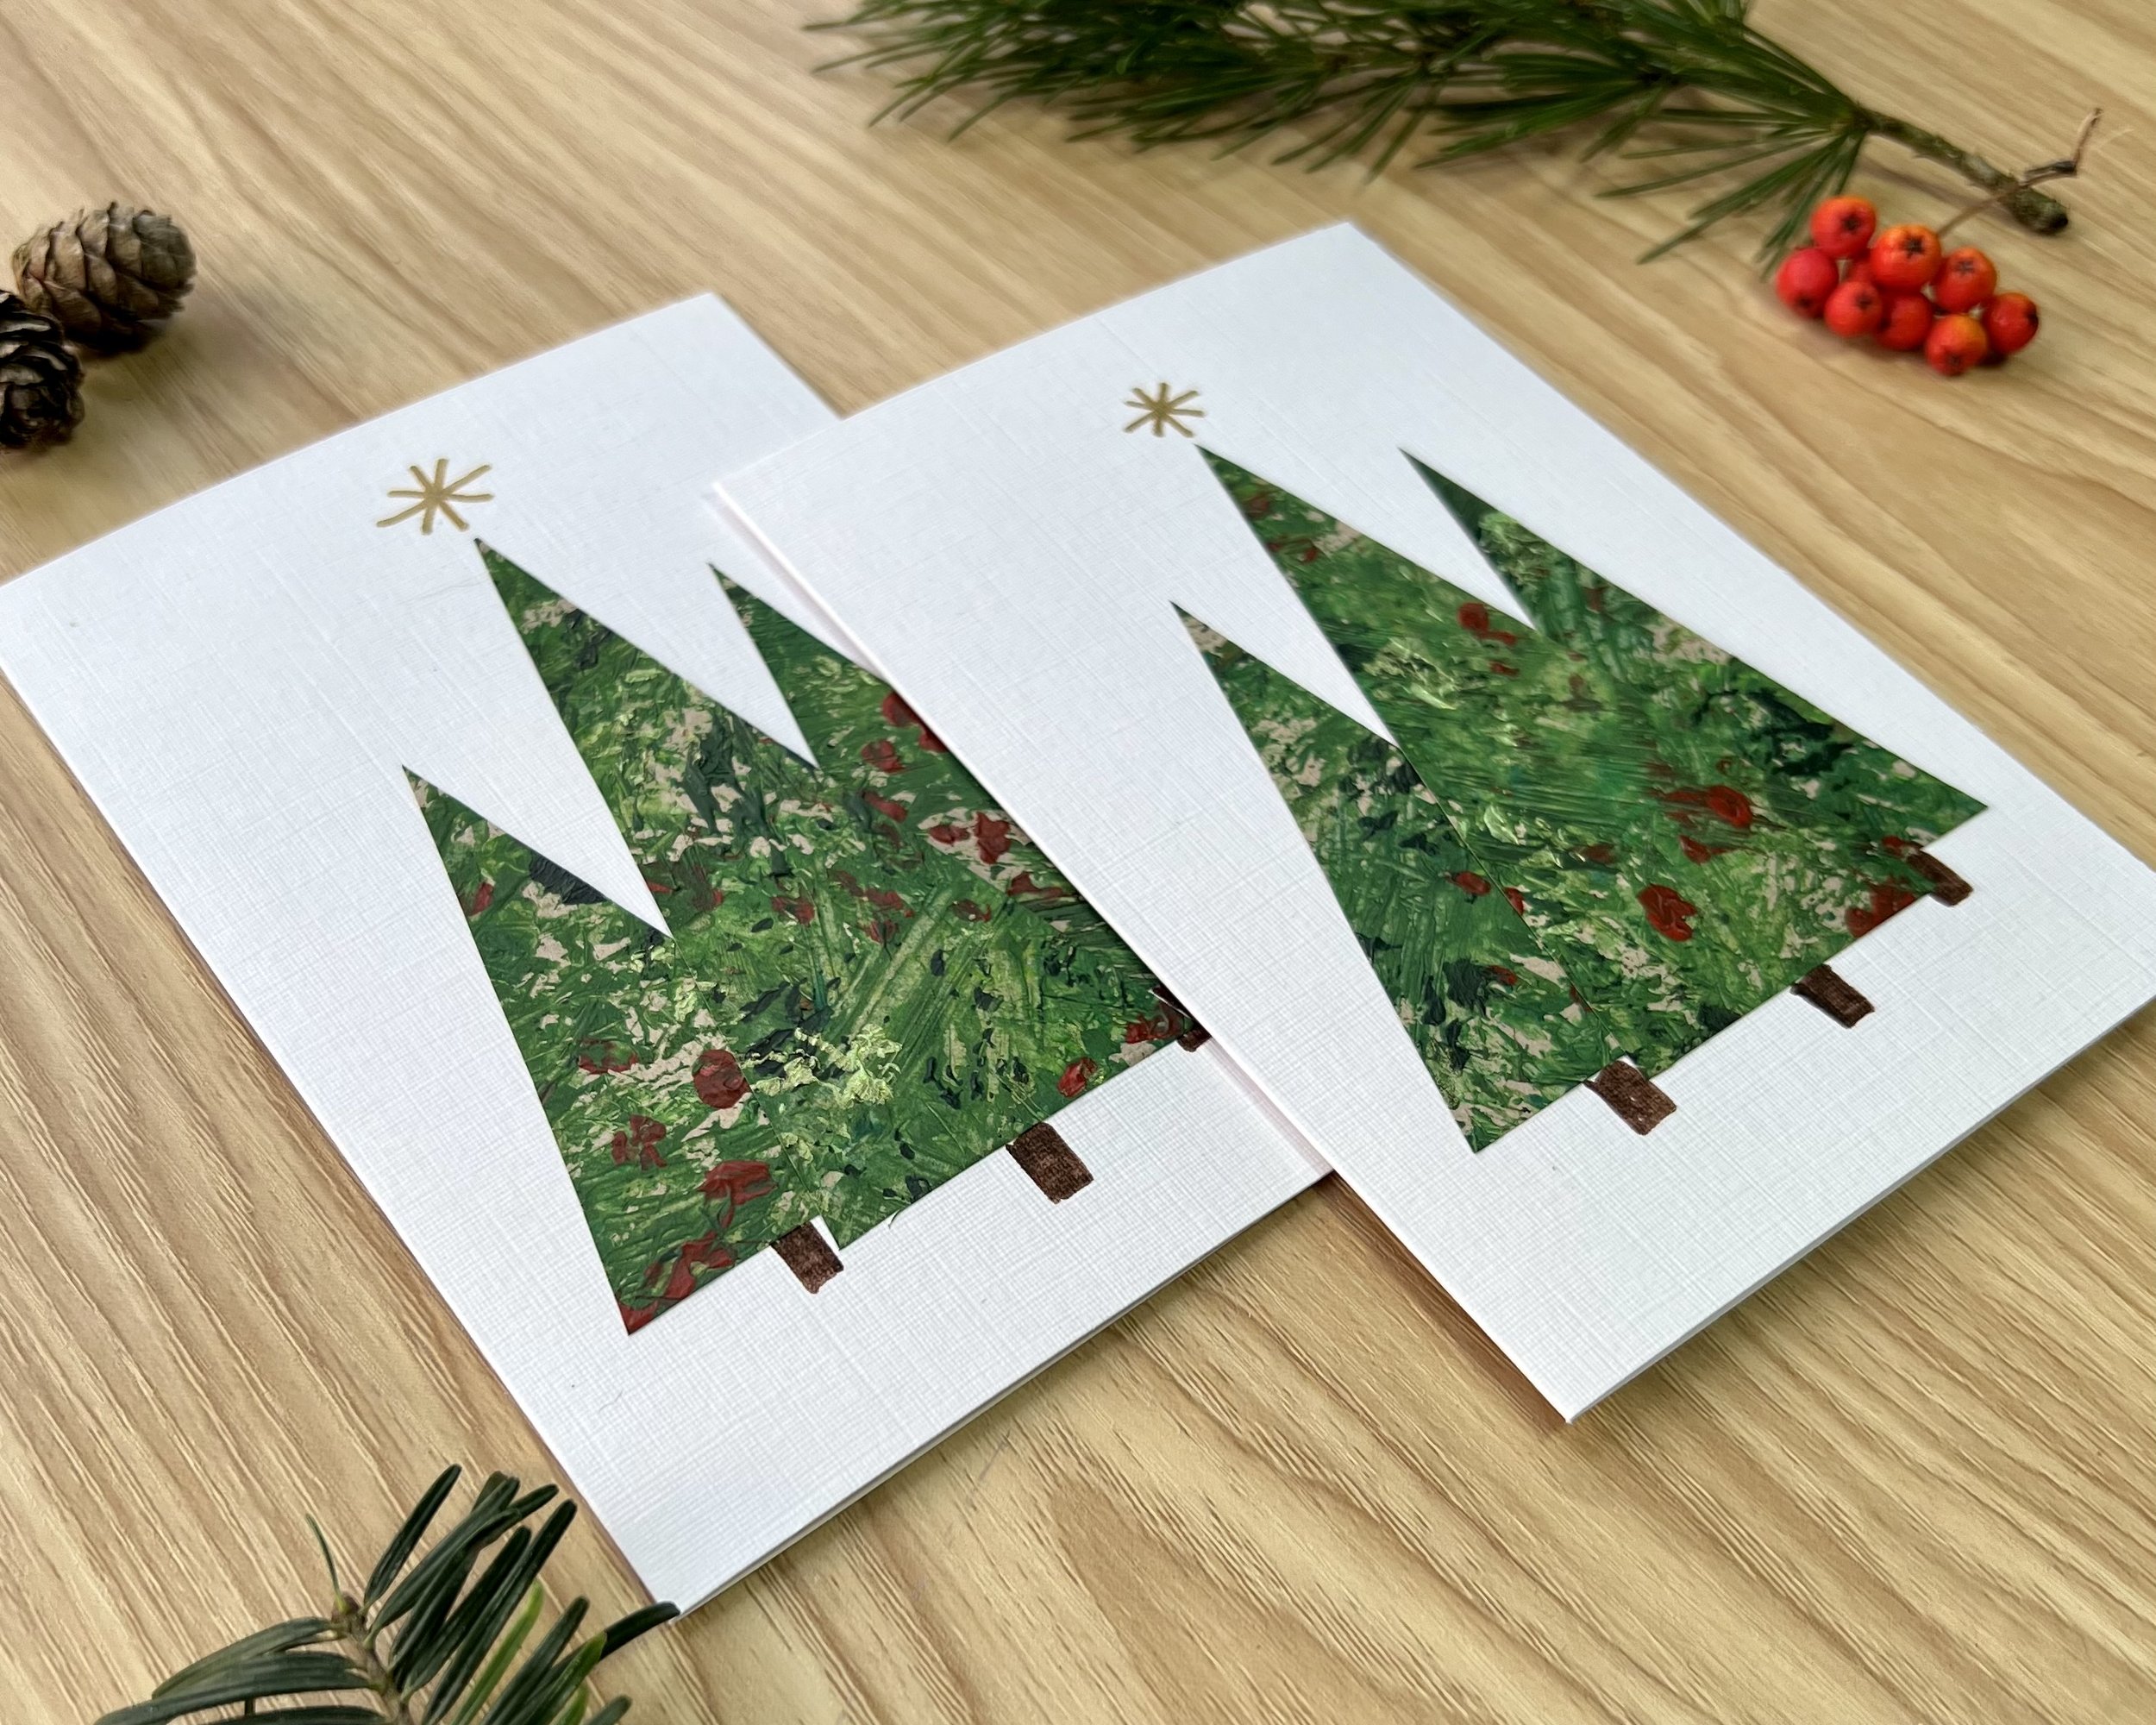
Arrange the three different sized trees onto your blank card and when you are happy stick them in place. I liked having them overlapping with the biggest tree at the front.
Draw small tree trunks with your brown pen and a star with your gold pen and then your card is finished! I think they look really pretty and I love the texture of the trees.


Author: Denise Hope, home educating mum of two boys