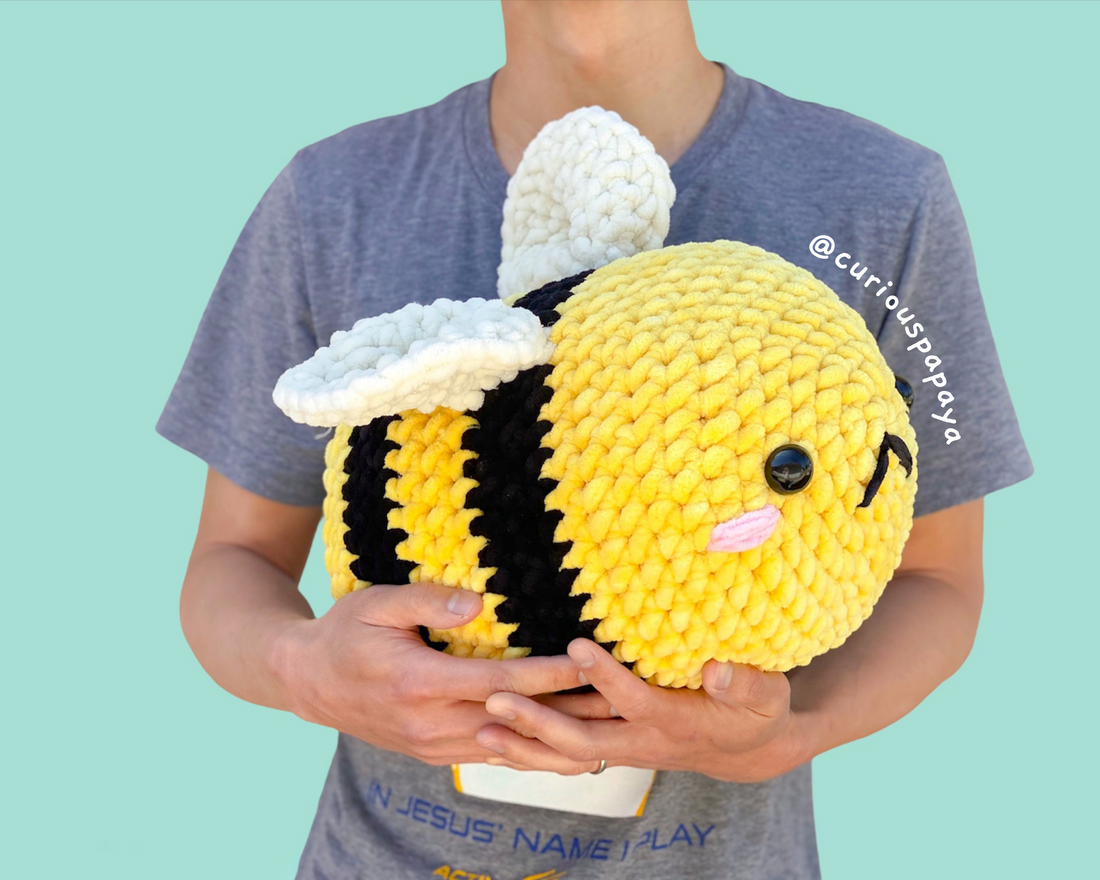
Everyone's favorite gal is in town - Jumbo the Giant Bee!
Featured on Clover's blog (the maker of some fab hooks), Jumbo is finally available for free here on curiouspapaya.
She’s huggable, squishable, and is perfectly cuddle-sized, measuring at 13 in. x 10 in. [33 cm x 25 cm].
*If you prefer an ad-free, printable PDF version of this pattern, you can purchase it HERE. Thank you for supporting my designs!
Here’s what you’ll need for this project:
Materials:
- Clover Amour Crochet NP (10 mm) – Art No. 1057/NP
- You will need Jumbo size 7 yarn in yellow (68 yd; 62 m), black (43 yd; 58 m), and white (24 yd; 22 m) - here I'm using Sweet Snuggles.
- Small amount of blanket yarn in pink, black for the facial features (here, I’m using Premier Parfait Yarn in Pink and Impeccable Solids in Black).
- Mini Patchworks Scissors – Art No. 493/CW
- Quick Locking Stitch Marker (Large)- Art No. 3032
- Jumbo Tapestry Needle – Art No. 3113
- Fiberfill stuffing (about 16 oz would be safe – some may end up using a little less)
- Size 24 mm safety eyes – or – black and white felt (and fabric glue) for the eyes
Terms:
- CH – chain
- FLO – front loops only
- SC – single crochet
- ST(s) – stitch
- DEC – decrease
- INC – increase
- SLST – slip stitch
- RND(s) – round(s)
- [#] – stitch count
- (…) x # – repeat the instructions within the parentheses # of times
NOTES:
*This pattern involves color changing. Because we are working in a spiral, we will have jogs between each round. To make the striped color changes more subtle, we will use the method of making a SLST into the last ST of the RND right before the color change. Then, pull up the new color as the first ST of the new RND. This will help alleviate the jog.
*Please note that when you cut this specific type of chenille yarn, experiencing some loose fibers is normal. You can carefully use a lighter to singe the ends if you'd like.
BODY (starting in yellow yarn):
RND 1: Make a magic circle and (SC) x 6 [6]
RND 2: (INC) x 6 [12]
RND 3: (SC, INC) x 6 [18]
RND 4: (2 SC, INC) x 6 [24]
RND 5: (3 SC, INC) x 6 [30]
RND 6: (4 SC, INC) x 6 [36]
RND 7: (5 SC, INC) x 6 [42]
RND 8: (6 SC, INC) x 6 [48]
RND 9-12: SC all around [48] (4 RNDs total)
Change to black yarn. Stuff as you go.
RND 13-15: SC all around [48] (3 RNDs total)
Change to yellow yarn
RND 16-18: SC all around [48] (3 RNDs total)
Change to black yarn
RND 19-21: SC all around [48] (3 RNDs total)
Change to yellow yarn (cut the black yarn and leave a short tail to weave in). If using safety eyes, insert them in between RNDs 4 & 5 in line with the center of the magic circle.
RND 22: SC all around [48]
RND 23: (6 SC, DEC) x 6 [42]
RND 24: (5 SC, DEC) x 6 [36]
RND 25: (4 SC, DEC) x 6 [30]
RND 26: (3 SC, DEC) x 6 [24]
RND 27: (2 SC, DEC) x 6 [18]
RND 28: (SC, DEC) x 6 [12]
RND 29: (DEC) x 6 [6]
Use the tips of your scissors to stuff the final bits of stuffing. Fasten off, leaving a short tail to sew the hole closed going through the FLO. Bury the tail in the body.

WINGS (make two, in white yarn):
RND 1: Make a magic circle and (SC) x 6 [6]
RND 2: (INC) x 6 [12]
Now we will begin working in “rows”. CH 1, Turn your piece.
ROW 3: (SC) x 10. CH 1, turn. [10]
ROW 4: (SC, INC) x 5. CH 1, turn. [15]
ROW 5: (2 SC, INC) x 5. CH 1, turn. [20]
ROW 6: (3 SC, INC) x 5. [25]
Fasten off and leave a tail for sewing. [25]

ASSEMBLY:
WINGS: To create pleated wings, fold the wing in a zig-zag shape before sewing. I like to think of it as an “M” shape. Make sure that the RS of the wing is facing up and use your yarn needle to weave the tail back and forth a few times to secure the pleats in place. Sew each wing along the first black stripe above each eye, about 4 STs apart.
*Tip: Sew the wings on the back part of the pleat to make them perkier vs. floppy!


FACIAL FEATURES:
*Note: There are so many endless possibilities with fun facial features! Here, I will demonstrate two options using felt eyes or safety eyes. You can choose between them or make up your own expressions!

EYES: If creating felt eyes instead of using safety eyes, cut out two circles with a 2 in. (5 cm) diameter out of black felt. Cut out two circles with a 1 in. (2.5 cm) diameter out of white felt. Use fabric glue and assemble the eyes in line with the center of the magic circle.
EYEBROWS: (optional) – To make Jumbo appear to be scowling, weave a double-strand of black acrylic yarn from the inner corner of each eye at an angle towards the outer corner 4x. Use fabric glue to secure the yarn down each time you loop around.
CHEEKS: Weave pink chunky yarn across 3 RNDs by each eye. Bury the tails in the body. Repeat the gluing process as done in the eyebrows.
MOUTH: Keep the mouth closely in line with the eyes to create a cuter look. Weave black yarn across 5 STs. Come out of the center of the magic circle. Then, weave the needle underneath the line we created and go back into the center of the magic circle. Bury the tail into the body. Repeat the gluing process as done in the eyebrows.
Et voila! Jumbo the Bee is finished!


14 comments
Best bee pattern that I could find super cute make more like it.
Love this pattern!! Very clear and easy to follow. :) Just wondering if you have a tutorial of more stripes for a lesbian flag. Representation matters!! Thank you so much!!!!!!!! :)
Thank you.
Loved the pattern and was super easy and not long at all for one of my first crochet projects.
hi there! really cute project, but added an extra row for 16-18, since I thought that having more space between the black stripes would look better~